|
Outlook is the well known application of MS Office and can install via www.office.com/setup. With Outlook application, you can stay connected and organized with emails, calendar and contacts in one place. 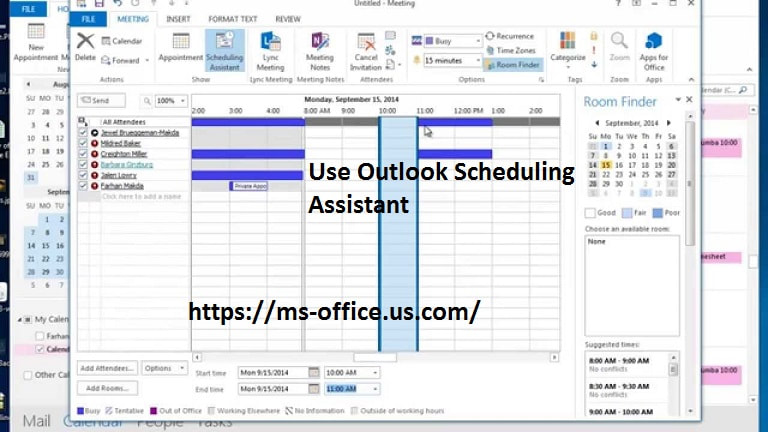 Way to Use Outlook Scheduling Assistant:
In Outlook, you need to tap on Calendar which is located in the bottom left side of the computer screen. Now from the Home tab, at the top left side of the screen, you should tap on the New Meeting icon. After this, you should select New Meeting from the drop-down list. Here, a new window displays on your screen. Then from the Meeting tab, you should select Scheduling Assistant. At this point, you should enter a description of the meeting in the Title text box. Next in the Required text box, you should enter the email address of each attendee who are required to attend the meeting. And in Outlook 2016 and 2013 instead, you should enter the attendees in the To field and also the conference room that you want to book under the Resources field. Here, you should also enter the Start and End times. Then from the Suggested Times list, you should choose the desired time or you can make adjustments to your time and date in order to find a time which works for everyone. Now in the Location text box, you should enter the address or room number where the meeting will be held. Here, in the Message area, you should enter any notes which your attendees want to know before the meeting like any special instructions or the Agenda. Lastly, set up the meeting and then tap on Send. For more details, hit on www.office.com/setup.
You should open Outlook and then go to File. After this, you should go to Open & Import and then Import/Export wizard will open. Now, you should select Export to a file. Then, you need to tap on Next option to continue. Here in the Export to a File dialog, you should select Comma Separated Values. At this point, you should tap on Next option. After this, you should select Calendar from Outlook Data File and then tap on Next option. If you see the Export to a File dialog appears on your screen, then you should tap on the Browse button. At this point, you should select the file’s destination. Now, you should select the destination where the file can be saved. Just Name the file and then tap on OK button to close the dialog. If you again see the Export to a File dialog displays on your screen, then tap on Next option to continue. Then, you need to tap on Finish option in order to export your Outlook calendar. Here, Outlook exports the particular calendar as a CSV file. At last, you should open it with Microsoft Excel and then you should save the file as workbook. Set a Time Zone for Meeting or Appointment in Outlook: Generally, Outlook uses the default time zone for Calendar but you can specify a different time zone for an event which you are creating it. In order to display the Time zone selector, on the Organizer Meeting tab or the Appointment tab, you need to tap on Time Zones. At this point, you should specify the precise time zone of the event. For more details about Outlook application, just go to the official website of Microsoft via office.com/setup. click here this link: If Game Audio Stops Working in Window 10! How to Fix it?
0 Comments
Leave a Reply. |
