|
There are many users who wish to create the backup of their Window Server. To know more about Windows, just visit to Microsoft via www.office.com/setup.  Way To Create Backup your Window Server:
Installation: First, you have to open Server Manager and then select Add roles and features. Now in the Before you begin window, you need to tap on Next option. After this, you need to select the Role-based or feature-based installation and then hit on Next option. Here under Select destination server, you should choose your server and then tap on Next option. Then in the Select server roles window, you should tap on Next option. At this point, just under the Select features, you should select Windows Server Backup and then tap on Next option. After this in the Confirm installation sections window, you should hit on Install and then tap on Close. How you can Use It? First, you should open Server Manager. Then, you need to launch the Backup utility. Now, you should tap on the Action tab and then select Backup Once. At the end to complete the process, you need to follow the on-screen instructions.
Installation: You should open Server Manager and then tap on Add roles and features. After this, you should tap on the Next button after you read the Before you begin page. Now, you should select the Role-based or feature-based installation option. Then, you should choose the server which you wish to back up and then tap on Next option. Here, you should select the server roles from the list just by ticking the boxes. At this point, in the Features list you should choose Windows Server Backup just by ticking the box. At last, you need to tap on Install option in order to begin the installation process. How you can Use It? When the Windows Server Backup feature installation is complete, then you should create a backup plan. For this, you should decide on your favorite plan and then follow the on-screen instructions. For more information, you should go to office.com/setup.
Installation: For this, you need to open your Server Manager. Then from the menu on the right of your screen, you need to tap on Manage and then select Add roles and functionalities. After this, you should select the Install based on a role of functionality option and then tap on Next option. Now, you should choose which server you wish your backup function to be installed to and then tap on Next option. Here, you should choose Windows Server Backup from the list and then choose Next option. At this point, you should check the box which is next to Automatically restart the destination server if necessary and then tap on Yes option and just select Install option. How you can Use It? When the installation process is finished, then you should open the Server Manager and just launch the backup utility. With this tool, you can create backups, manage and then just restore files according to your need.
Installation: You need to open Server Manager. And then select the Features option from the left menu. After this, you should tap on Add features, in order to open the Select Features page. Now, you should expand the Windows Server Backup Features option. At this point, you should tap on the box which is next to Windows Server Backup. Here, you need to choose Install option to begin the installation process. How you can Use It? For this, you should open Server Manager. Then, you need to launch the Backup utility. After this, you should tap on Create new backup and then follow the instructions to finish the procedure. For more details about Window Server, you should visit to Microsoft via office.com/setup.
0 Comments
Microsoft Office is the advanced application of Microsoft which helps the user in many ways. The MS Office doc Imaging tool is the great feature designed by Microsoft which is installed by default. This feature comes in Windows 2003 and also there in the earlier version of MS Office. This feature helps the user to convert the text on the scanned images to the word doc. The user can use the MS Office doc imaging tool to scan the text or the user can reinstall this tool on their own. It is a convenient to reinstall the software programs such as MS Office document imaging Tool. When the user finished this task, they can scan the text of the doc into the Word. You can install this feature of MS Office via www.office.com/setup.  Way to Use the MS Office doc Imaging Tool:
The above method helps the user to use Microsoft Office doc Imaging Tool to scan the text of the Word document. If the customer requires any sort of help, then they can anytime navigate to the site of Microsoft Office through office.com/setup. Sometimes the users face formula errors in Excel, then this means you should re-check the error source. And for help, they can go to the site of MS Office via www.office.com/setup. 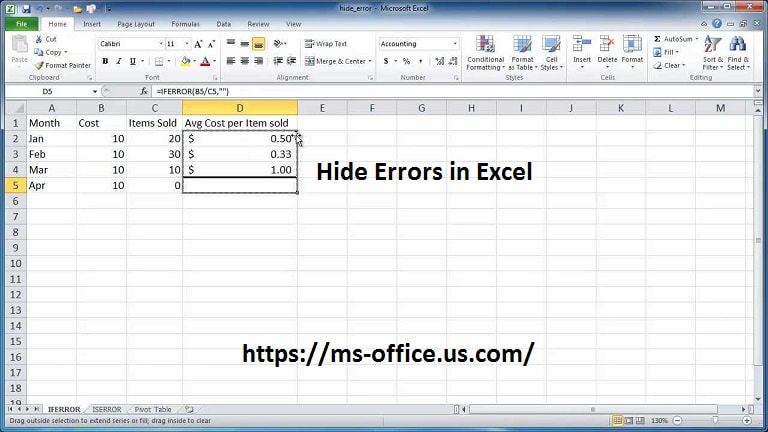 Way to Hide Errors in Excel:
For this, you should first click over the PivotTable report and then it will start showing PivotTable Tools. Then in Excel 2016/2013: you should go to the Analyze tab and then go to the PivotTable. Now, you should click on the arrow sign which is present next to the Options, and then select the Options button. Now in Excel 2010/2007: Here from the Options tab, you should click on the PivotTable group. At this point, you should click on the arrow sign which is present next to Options and then select Options. After this, you should click on the Layout & Format tab and then try the following options: If you want to Change Error Display: Then from the Format tab, you should choose the “For error values show”. Here in the box, you should assign the value that you wish to show in place of errors. To show errors such as blank cells, you should clear all the characters which is present in the box. To change Empty Cell Display: From the Format tab, you should choose the “For empty cells show” option. Here in the box, you should assign the value which you wish to show in place of errors.
For this, you should select the formula cell which is having the problem. Then in Excel 2016/ 2013/ 2010, you should click on the File and then select Options and then tap on Formulas. Now in Excel 2007, you should click on the Microsoft Office Button and the click on Excel Options and then hit on Formulas. Here, in the opened Error Checking dialog box, you should clear the check box of Enable background error checking. For more information, click on www.office.com/setup.
For this, you should select the cells range which has the error value. Then, you should go to the Home tab and then in the Styles group, you should click on the arrow sign which is present next to the Conditional Formatting. Now, you should click on the Manage Rules option. Here, the Conditional Formatting Rules Manager dialog box opens up on your screen. After this, you should hit to the New Rule. Now, the New Formatting Rule dialog box opens up on your screen. From Select a Rule Type section, you should click on the Format only cells that contain. Here from the Format only cells with section, you should go to the Edit the Rule Description option and then tap on the Errors. After this, you should go to the Format tab, and then hit over the Font. At last, to open up the Color list you should click on the arrow sign and then from the Theme Colors, you should choose the white color. Through this way, you can hide errors in Excel. For more details, the user can go to the site of Microsoft via office.com/setup. more info here this link: What are the Basics of MS Excel? Sometimes users find some issues or they wanted to install latest version of Office, so in this situation they have to uninstall Office Setup from their devices. In this post, you will read the method to uninstall and reinstall Office setup in their devices. If the customer requires help, then go to MS Office via www.office.com/setup.
Way to Uninstall Office Setup:
click here this link: What are the Microsoft Office Programs and Services ? Way to Reinstall Office Setup: If the users want to shift their Office Setup into another device or if they uninstall Office Setup, then to reinstall Office setup you should follow the below steps:
If the customer needs help with the uninstallation and re-installation of Office setup, then go to office.com/setup. read also....................................... webroot.com/safe avg.com/activate Outlook is the well known application of MS Office and can install via www.office.com/setup. With Outlook application, you can stay connected and organized with emails, calendar and contacts in one place. 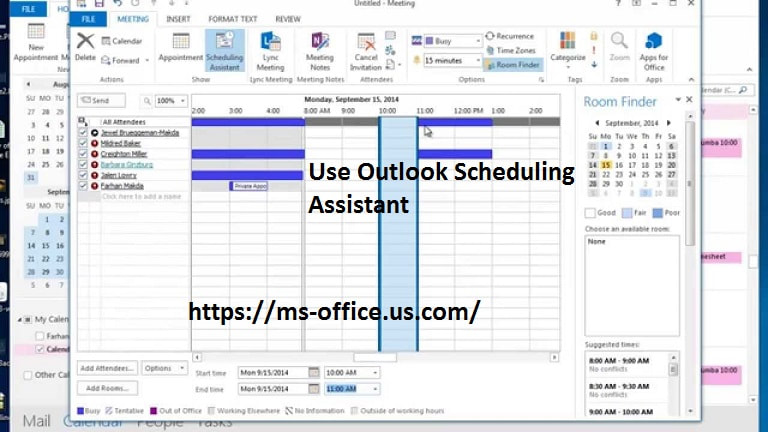 Way to Use Outlook Scheduling Assistant:
In Outlook, you need to tap on Calendar which is located in the bottom left side of the computer screen. Now from the Home tab, at the top left side of the screen, you should tap on the New Meeting icon. After this, you should select New Meeting from the drop-down list. Here, a new window displays on your screen. Then from the Meeting tab, you should select Scheduling Assistant. At this point, you should enter a description of the meeting in the Title text box. Next in the Required text box, you should enter the email address of each attendee who are required to attend the meeting. And in Outlook 2016 and 2013 instead, you should enter the attendees in the To field and also the conference room that you want to book under the Resources field. Here, you should also enter the Start and End times. Then from the Suggested Times list, you should choose the desired time or you can make adjustments to your time and date in order to find a time which works for everyone. Now in the Location text box, you should enter the address or room number where the meeting will be held. Here, in the Message area, you should enter any notes which your attendees want to know before the meeting like any special instructions or the Agenda. Lastly, set up the meeting and then tap on Send. For more details, hit on www.office.com/setup.
You should open Outlook and then go to File. After this, you should go to Open & Import and then Import/Export wizard will open. Now, you should select Export to a file. Then, you need to tap on Next option to continue. Here in the Export to a File dialog, you should select Comma Separated Values. At this point, you should tap on Next option. After this, you should select Calendar from Outlook Data File and then tap on Next option. If you see the Export to a File dialog appears on your screen, then you should tap on the Browse button. At this point, you should select the file’s destination. Now, you should select the destination where the file can be saved. Just Name the file and then tap on OK button to close the dialog. If you again see the Export to a File dialog displays on your screen, then tap on Next option to continue. Then, you need to tap on Finish option in order to export your Outlook calendar. Here, Outlook exports the particular calendar as a CSV file. At last, you should open it with Microsoft Excel and then you should save the file as workbook. Set a Time Zone for Meeting or Appointment in Outlook: Generally, Outlook uses the default time zone for Calendar but you can specify a different time zone for an event which you are creating it. In order to display the Time zone selector, on the Organizer Meeting tab or the Appointment tab, you need to tap on Time Zones. At this point, you should specify the precise time zone of the event. For more details about Outlook application, just go to the official website of Microsoft via office.com/setup. click here this link: If Game Audio Stops Working in Window 10! How to Fix it? If you get OneDrive is full notification on your screen this means you don't have enough space and you have to delete some files from your device to increase the space. If the customer needs any sort of help, then you can visit Microsoft through www.office.com/setup.  Way To Fix If One Drive is Full:
First of all, you should right-click on the OneDrive icon which is in the notification area and then open Settings. After this, you should select Account tab. Now, you should tap on the Unlink this PC button. Then, you must Sign in with your credentials. At last, you should select the location of the OneDrive folder.
In the Notification area, you should right-click on the OneDrive icon and then open Settings. Here under the Account tab, you should tap on the Unlink this PC button. Now, you should Log in with your credentials. Then, you need to select another location for the local OneDrive folder and also the files which you wish to sync. If in case, there are lot of files then the sync process will take some time according to the size and the bandwidth of the file. For more help, go to www.office.com/setup.
You should press Windows key + R in order to open the Run command-line. Here in the command line, you should paste or type the line and then hit Enter key: %localappdata%\Microsoft\OneDrive\onedrive.exe /reset Now, you should right-click on the OneDrive icon in taskbar’s notification area and then open Settings. At last, you should again Sign in.
First of all, you need to press Windows key + I in order to open Settings. After this, you should open Apps. Now, you should select Apps & features in the left side of the screen. Here in the Search bar, you should type One and then expand OneDrive. At this point, you should uninstall OneDrive. At this point, you should follow this path: C:\Users\:Your Username:\AppData\Local\Microsoft\OneDriveUpdate Then, you need to double-click on the OneDriveSetup.exe file and then run the installer. When the installation completes, then just log in and just look for changes.
If the above solutions cannot remove the OneDrive is full error. Then in this situation you can send the ticket to Microsoft and can explain your problem. So, that they give you the future updates. Here to fix the issue, you can also use the browser version of OneDrive in order to access your files, upload new or download old files without issues. At last, you should log in with your Microsoft credentials. The above method will help you to fix the issue if One Drive is full. If the customer needs any kind of help, then visit to the Microsoft via office.com/setup. click here this link: If Your Computer Screen is Faint and Too Dark At Full Brightness! How to fix it? Sometimes, users face issue if Another app is controlling your sound. And for help, the user can visit to www.office.com/setup.  Way to Resolve If Another App is Controlling Your Sound:
This issue occurs because of the MS Office Upload Center. To fix this issue, you have to pause the upload. But this issue can be permanently fix with an update. For this, you have to open any Office application. After this, you should go to File and then tap on Account. Now under Product Information, you have to click on Update Options and then tap on Update Now. If in case, Office isn’t up to date, then updates will be downloaded automatically.
For this, you should start Task Manager. For this, you can press Ctrl + Shift + Esc at the same time. When Task Manager starts, you should go to Details tab. Now, you have to locate audiodg.exe, and right click on it and then choose End Task from the menu.
You should press Windows Key + R at the same time and then enter services.msc and press Enter key. If the Services window opens, then you’ll see a list of all services. Here, you have to locate Windows Audio service and then double click on it to open its properties. At this point, you should check the Startup type and Service status. You should set Startup type to Automatic and Service status to Running. At last, click on Apply and OK button to save changes. For help, visit to www.office.com/setup.
You should open Device Manager. For this, you should press Windows Key + X in order to open Win + X menu and then select Device Manager from the list. If Device Manager opens, then look for your audio driver. It might be located in Sound, video and game controllers section. When you find your driver, then right click on it and then select Disable device from the menu. At this point, you will receive a warning message and then click on Yes option to move further. At last, you should locate your audio driver once again and then right click on it and then select Enable device.
First, you need to connect to your Bluetooth device. Then, you should start Groove Music. After this, you should go to YouTube and watch any video. Now, you should stop the video playback and then just try to play music in Groove Music.
You have to press Windows Key + S together and then enter sound. After this, you should choose Sound from the list of results. Now, you should locate your audio device, like Speakers, and just right click on it and then select Properties. Then, you have to go to Advanced tab and then uncheck Allow applications to take exclusive control of this device option. At this point, you should click on Apply and OK button to save changes. Lastly, just restart your PC. The above method helps to fix the issue if Another app is controlling your Sound. If the customer needs help for solving this issue, then just go to office.com/setup. click here this link: What is the Method to Increase Laptop Volume Beyond 100% in Window 10? Microsoft Excel is the commonly used application of MS Office. But sometimes users encounter issue like Excel Text to Column not working. And can install via www.office.com/setup 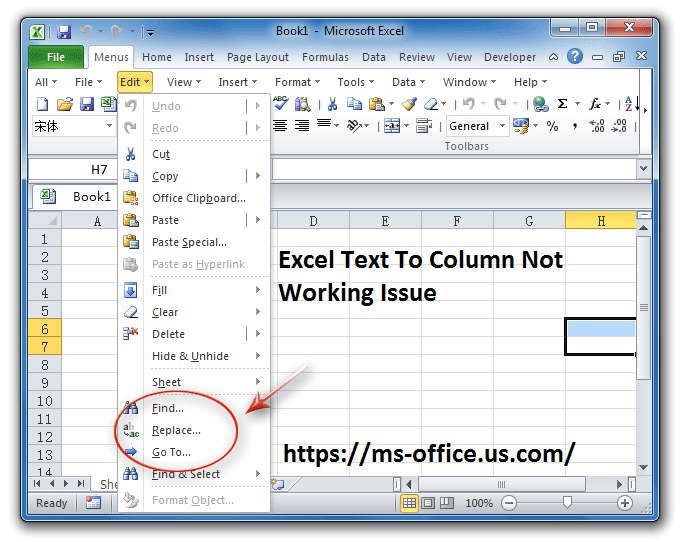 Way to Fix Excel Text To Column Not Working Issue: Step 1. Use Data As A Split Point: To fix the issue, you should split Excel data into two different columns. Here, you have to make use of the space like a split point.
For this, first of all you have to select the data and then you should visit to the data tab from the Excel ribbon. Here, you have to choose the text to columns.
As the data is already separated with space, hence the characters like commas just separate each of the field. So, here you have to use the “delimited” option in order to convert text to columns in Excel.
In the open Convert Text to Columns box, you have to choose Delimited option and then click on Next. But your data is not split into the columns, so for this you should check the “space” option. When you will do this, then you will view your data gets split where the space comes in the path. Now in the red-box, you can view the preview of your data that how your data will look after splitting. There is a vertical black line which separates your worksheet data into different columns. Lastly, just check your data is been spitted correctly or not.
When you check out each point in the preview sections, then you have to press Next. After this, you have to choose the destination location which means where you have to keep the split data into your worksheet. Finally, you need to hit on the finish button. For details, hit on www.office.com/setup. Step 2. Using The Fixed Width Method:
First, you have to choose the data which you want to split. Now, you should go to Data tab and then click on Text to Columns. Here from the opened Text to Columns Wizard, you should select the Fixed width option.
You have to press the next button. Then, you will view the preview of split Excel data. If in case, Excel is not showing correctly then you can make some changes. For this, you have to click on the preview option in order to add the line from where each line will get split. You have to double-click on the line if you wish to remove it. After this, you have to Tap and drag the split line in order to shift to other location. Now, you have to press Next button. Here, you have to choose how you can import each of the new columns. If in case, the user wish to import worksheet column with the same data format then they should tap to that column and then select General option from the column data type.
You have to keep split data in different location. It is suggested you should not keep it over the place where you place the original data. Otherwise, it will overwrite your original data. After this, tap on the Finish button just for splitting up your cell text into columns. The above method will help you to fix Excel text to column not working issue. If the customer need help, then navigate to office.com/setup. click here this link: What is the Method to Add or Remove a User in MS Office for Business? Sometimes users face the Ethernet or Wi-Fi Adapter Issues, so in this situation it will be very difficult to surf your favorite websites without the internet. For more information, just go to www.office.com/setup .  Way to Fix Ethernet or Wi-Fi Adapter Issues:
First, you have to press Windows Key + I together in order to open the Settings app. Then, you should go to the Update & Security section. At this point, you should choose Troubleshoot. Here in the right side, you should select Internet Connections and then tap on Run the troubleshooter. Finally, follow the directions to finish the procedure.
Sometimes this problem is caused due to outdated drivers so in order to fix this issue you should update your drivers. For this, first you should find the model of your network adapter and then go to the manufacturer’s website. Now, you should download the latest driver for your adapter, and then transfer it to your PC and just install it. When the driver is installed, then check if the problem is solved or not. So, you can use professional driver updater software. For more help, just go to www.office.com/setup.
First of all, you have to tap on the network icon which is on your Taskbar and then select your network. After this, you need to select Change adapter options. Now, you have to right-click on your network connection and then choose Properties from the menu. Here, you will see the list of properties will appear. Just check the following properties are enabled: Client for Microsoft Networks File and Printer sharing for Microsoft Networks QoS Packet Scheduler Internet Protocol Version 4 (TCP/IPv4) Internet Protocol Version 6 (TCP/IPv6) Link-Layer Topology Discovery Responder Link-Layer Topology Discovery Mapper I/O Driver At last, you should hit on Apply and OK button to save changes.
You should press Windows Key + R and then write services.msc. After this, tap on OK or press Enter key. Now, you have to locate WLAN AutoConfig service and then double-click on it. At this point, you should go to the Dependencies tab and then check all the services on the list. You should write down all the services. Here, you should go back to the Services window and then check all the services are running. You should set their Startup type to Automatic. At last, just restart your PC.
You should press Windows Key + X together and then select Command Prompt as an Admin. After this, you should run the following commands: netsh winsock reset catalog netsh int ip reset reset.log hit Once you running these commands, then just check if the problem is solved or not.
For this, you should press Windows Key + X together and then select Device Manager from the list. After this, you should locate your network driver and then right-click on it and then select Uninstall device. Here, you should check Remove driver software for this device option. At this point, you should click on the Uninstall button to confirm. At last, you should hit the Scan for hardware changes icon and then Windows will automatically install the default driver. For more details about Wi-Fi issues, you should visit to the site of Microsoft via office.com/setup. click here this link: If This Workbook was Opened in Read-Only Mode! How to Fix It? Sometimes, user’s Microsoft Account gets hacked. For more information about MS Account, go to www.office.com/setup.  How to Check If Microsoft Account Gets Hacked?
What You Should Do If MS Account Hacked?
If in case, your account has been hacked but you can still use your Microsoft account, then you should immediately set up a new password. For this, you should sign in to your MS Account and then visit to the Change password menu. You should fill the empty boxes from the menu and then change your old password with a strong and new password. You can also use a password checker to test the strength of your new password.
If in case, your Microsoft account has been hacked then you will no longer be able to connect. So, in this situation you should reset your password. You can also go towards the troubleshooting process which is provided by Microsoft in which you should select I think someone else is using my Microsoft Account. After this, just follow the on-screen directions to reset your password and also to set up a new pass for your personal account. For details, you should go to www.office.com/setup.
If in case, you cannot be able to reset your pass then you should recover your Microsoft Account. In this, Microsoft has provided you a service through which you can recover your personal account without using a password. For this, you should go to this page and then fill up the question and answer. Here, you just have to follow the on-screen directions and then your Microsoft account will be recovered.
When you restore your Microsoft account, then you should add some extra security features just to protect your personal info and data. For this, you should use Microsoft’s own settings which appear on your own account and then signed in. After this, go to Account Summary and then change the info which you think it was hacked. And you should also visit to Security info and then add as many details just to protect your account and also help Microsoft to protect your data against malware attack. For more details about Microsoft Account, just visit to the official site of Microsoft Office via office.com/setup. learn here this link: If Keyboard Keep Typing of its Own! How to Fix it? |
